As far as the end-users are concerned, these extensions help them to easily get hold of the required file information. This direct identification of the files also comes in useful from the security point of view. For example, if you are trying to get hold of a PDF Document from the web but upon downloading it, you find it to be an EXE file, then there’s a high chance of it being a malicious program, and you should discard it at the earliest. Likewise, if we turn our attention towards the OS, it would only be able to load a particular file to its associated program once it can identify its extension. For example, as soon as the OS views the extension to be JPG, it would automatically send that file to the assigned Image Viewer app. All in all, there are quite a few benefits associated with these file extensions. So keeping these points in mind, let’s make you aware of the various methods to view file extensions in Windows 11.
How to Know the File Extensions in Windows 11?
This guide will make you aware of five different methods to carry out the aforementioned task: via Layout & View Options, Folder Options, Sort By option, via Command Prompt, and using Registry Editor. You may try out the one that you find most comfortable to execute.
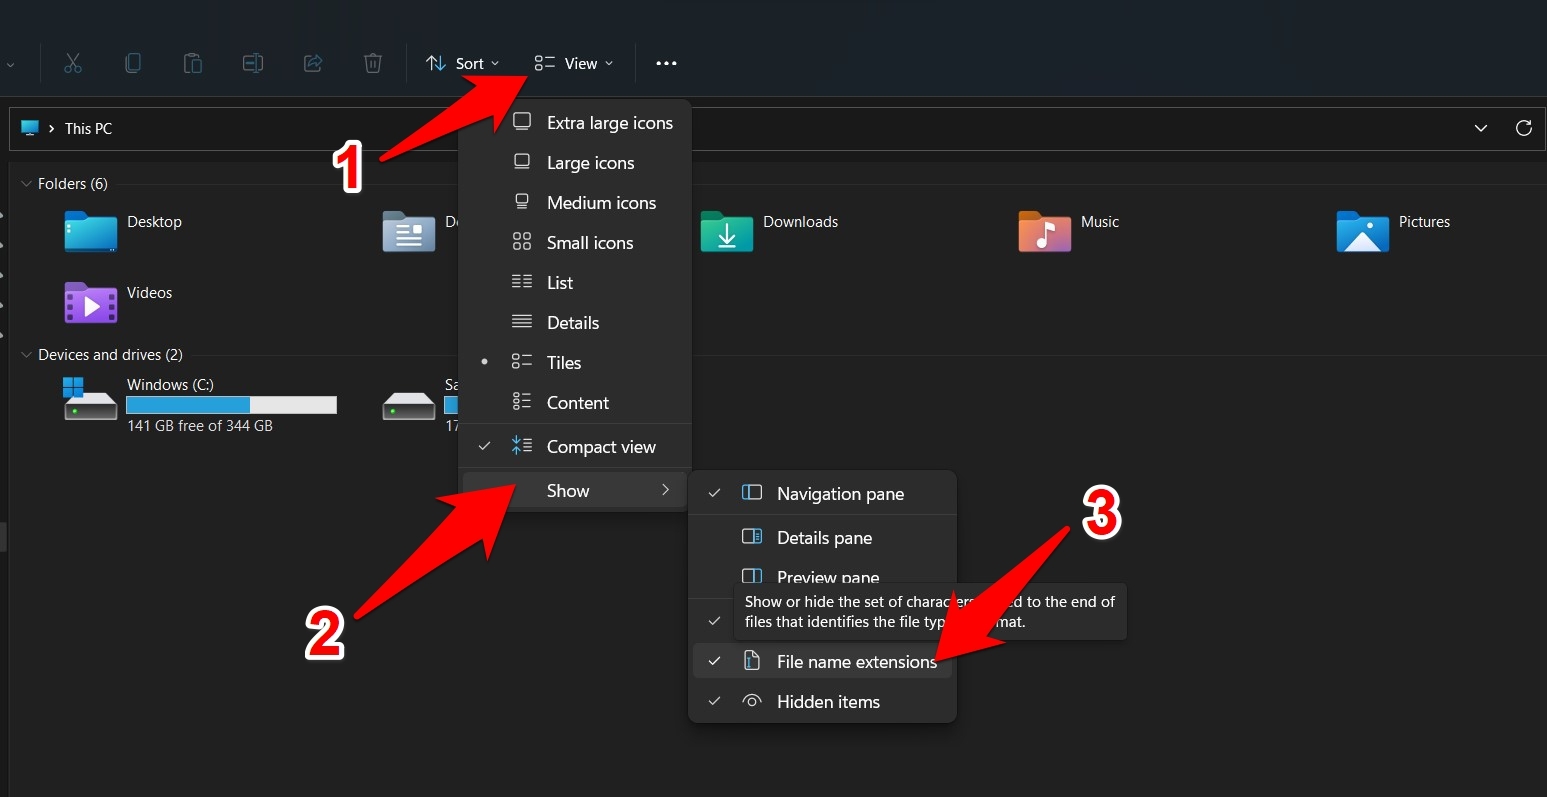
Via Layout & View
So these were the steps to view File Extensions in Windows 11 via Layout & View menu. Let’s now check out some of the other ways through which this could be achieved.
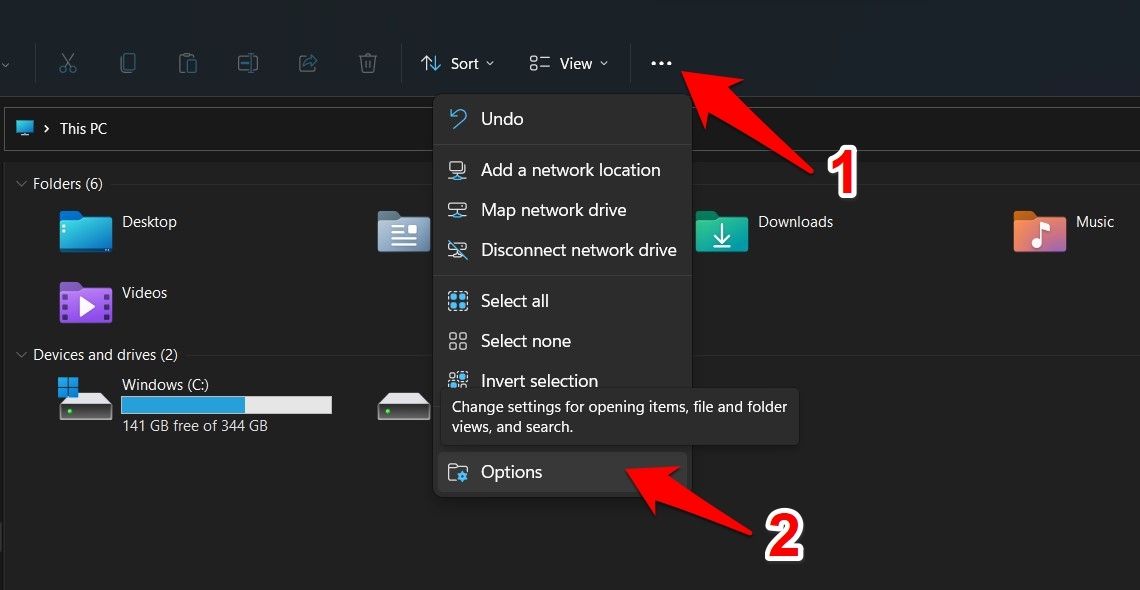
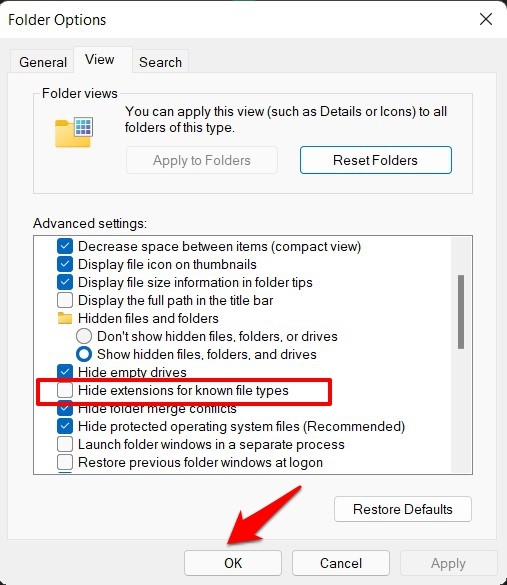
Via Folder Options
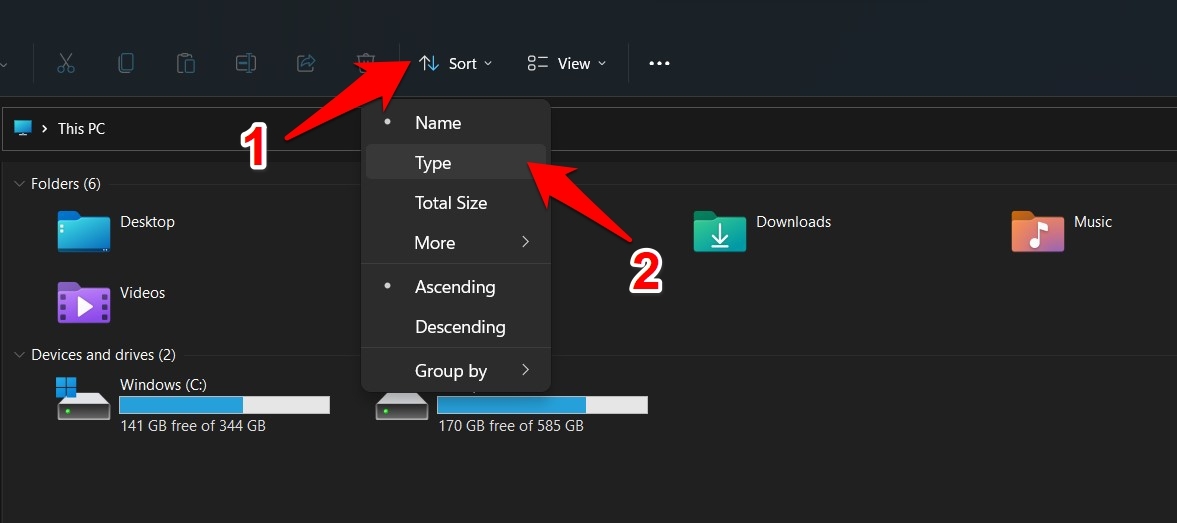
Via Sort By Option
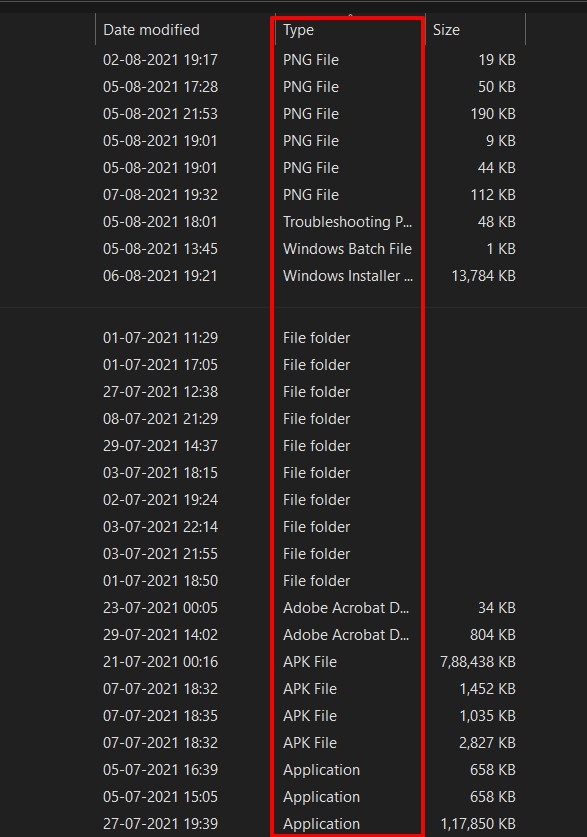
This method is slightly different from the others in that it wouldn’t add the extension to the end of the file name. Rather, it would categorize all the files with the same extensions under one roof. Moreover, the sorting is only limited to File Explorer instead of other methods where the appended extensions would appear throughout all the locations on your PC. Anyways, to try it out, here’s what you need to do: So these were the steps to view file extensions in Windows 11 via the Sort By option.
Via Command Prompt
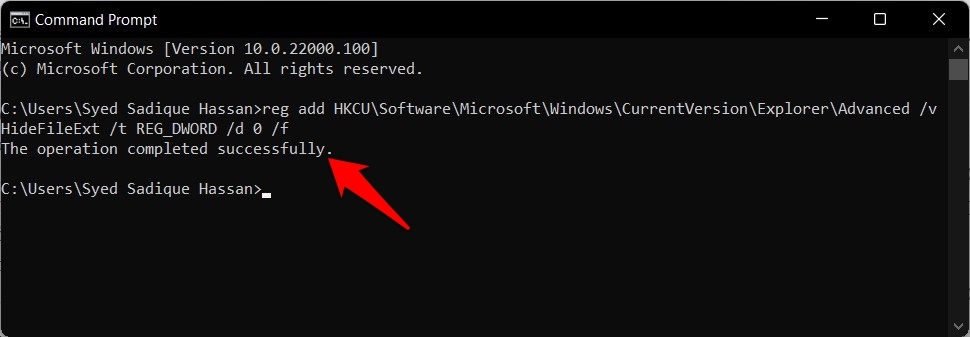
In this section, we will be creating a new Registry value named HideFileExt and then assigning it the value False, i.e., 0. All this would be done using just a single line of command. Here’s how: So this is how you could view file extensions in Windows 11 via Command Prompt. Let’s now make you aware of the fifth and final method to carry out this task.
Via Registry Editor
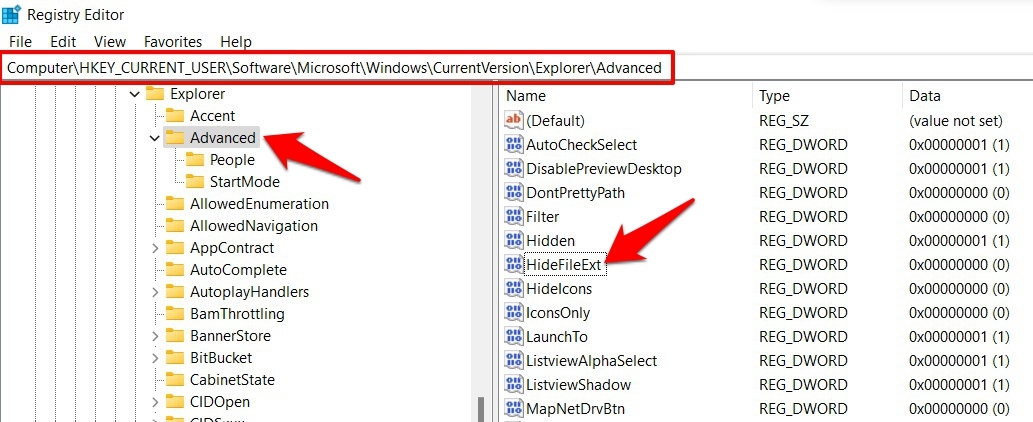
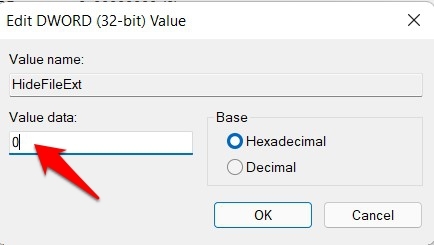
This method is similar to the one that we have just done via the Command Prompt. The only difference is that we would be manually creating that Registry Editor value and assigning it the required values here. Follow along. If you wish to revert the decision at any point in time, i.e., hide the extensions, then just change the value of HideFileExt to 1 and save it.
Conclusion
On that note, we round off the guide on how you could view file extensions in Windows 11. We have shared five different methods for the same. While the first three involves File Explorer, the next two directly or indirectly involve Registry Editor’s usage. Do let us know in the comments section if you have any queries with any of these five methods. If you’ve any thoughts on How to Check File Extensions in Windows 11?, then feel free to drop in below comment box. Also, please subscribe to our DigitBin YouTube channel for videos tutorials. Cheers!